


?")


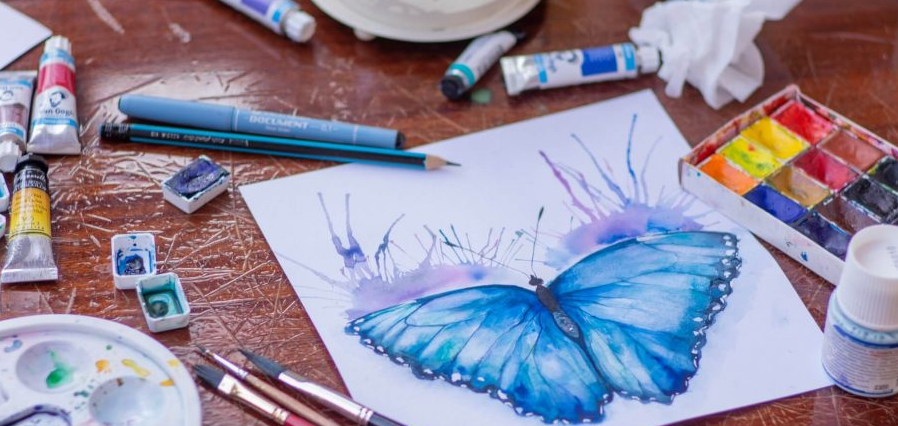
Unique Ideas for an artistic project to do today. Creativity is a quality that each of us has. The question is how to develop it. Different techniques can help you be successful. You have already had great success in your research. You are on the right page because we have designed and a thousand ideas for manual activities supported by many tutorials. The best creative activity will always be your urge to create something pretty. So, in order not to waste time, we suggest that you start immediately.
What you will need:
- Pictures
- 12 square pieces of cardboard 30 cm square
- Colored or patterned paper
- Tape or tape
- Colored pencils or pens
- Black pen or fine point marker
- Glue
- Rule
- Scissors
- Clip with a hook to hang your calendar
Decide which photos you want to use for each month, and arrange them across the top of the page. Draw a border 5mm from the edge around one of your pieces of cardboard with a pencil or pen in the color of your choice. Measure 15cm from the bottom of one of your square boxes and draw a horizontal line on the 15cm mark, from one side of the cardboard to the other. It will split your calendar page in half – one half for photos, the other half for the calendar grid and cool drawing ideas.
Unique Ideas for an artistic project to do today
To make your grid, draw vertical columns with 4cm intervals. Then remove horizontal rows with 3cm intervals above your columns. It will create the grid. Take your black pen or marker, and write the names of the days (Monday, Tuesday, etc.) along the top row. Then, using the same cell or feature, write numbers on the grid each day (2018 starts on a Monday, so it’s easy).
Fill in all the important dates and decorate with a ribbon or washi tape so that they stand out. Include dates such as birthdays, New Year, Christmas. Once you have the grid with all the dates, it is time to develop your creativity and imagination. Decide on an arrangement for your photos, colored paper, patterns, washi tape, and stick-on. Next, glue your account on the top half of your square cardboard. You can see in the photos below what I did to decorate my calendar:
The materials needed for creating a pretty Christmas wreath:
- Acrylic paints
- Extreme art deco sheen champagne gold
- Embroidery hoop
- Glue gun
- Glue stick (2 sizes)
- Leaves (preferably magnolias)
- Paper tray
The steps to follow:
- Separate several leaves from their branches. I wanted magnolias but could not find them, so I just looked like a lookalike. Squeeze some paint onto a palette. Please pick up and glue the stick, dip it in the paint and push it against the sheet. Repeat until you have the entire sheet covered in a random polka dot pattern. You will need 8-10 of each, preferably 2 of each color.
- The remaining leaves are then painted gold. I found the perfect champagne gold for this project with just the right color, like the new iPhone.
- I suggest that before you start tying the leaves to the hoop, try out an arrangement you like. Then continue gluing until you have covered the hoop. While making sure you stay centered, so you don’t end up with a twisted-looking garland.
The materials needed:
- 2 frames
- White cardboard
- White paint and brush (if your frame is not already white)
- Hot glue gun
- Black adhesive vinyl
- Cutting mat and craft knife (if you don’t have an electronic cutting machine)
- Snowflake glitter
The realization is effortless:
Paint your two frames white. Cut your vinyl “Let it snow” by hand or with your machine. You need to make sure that you cut your words on the adhesive side of the vinyl, as they will stick to the glass on the outside.
Then add your vinyl to the glass of a frame. Add hot glue to the back of your structure and glue the other edge to it – this will create your “shadowbox.” Trace the back of one of your frames on a piece of white card stock and cut it out. Then glue it to the front of the back so that the white paper will be seen inside the frame. With your edge facing down, add a ton of white snowflake glitter inside.
The materials needed to create a pretty terrarium:
- A clear glass container – ball aquarium, cookie jar, vase, glass
- Decorative potting soil or sand in your favorite color
- Recycled pebbles, pebbles, or pieces of glass.
- Plants of your choice
It is an effortless creative activity once you have all the necessary things. What are the steps to follow? Find them below:
- Start with a layer of pebbles about an inch or so.
- Fill the container halfway with potting soil.
- Place your plants.
- Decorate with all kinds of figurines to create a mini garden or a mini forest.
Materials needed:
- Dried plants, flowers, etc.
- Light string
- Transparent paper
- Iron
- Scissors
The procedure to realize this idea is elementary:
- Cut and cut the leaves into small pieces.
- Cut a piece of transparent paper about 40 centimeters.
- On one side of the paper, arrange the sheets on the back (the rough side with an adhesive).
- Fold the paper in the middle so that the reverse sides are facing each other.
- Set the iron to low heat and secure the sheets between the two layers. Leave a centimeter or two to tie the ends.
- Get ready with your fairy lights, and you are prepared to enjoy a moment of calm filled with magical starry light.


